Tuesday, January 19, 2016

Title screen

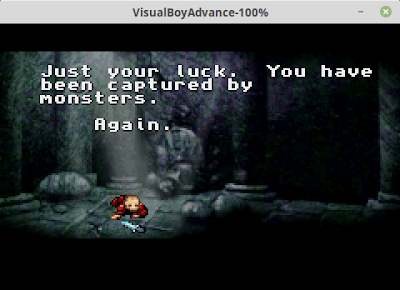
Thanks to the sample code of really smart people out there, I now have a working title screen!

The hardest part was similar to the last problems I talked about: cycle timings getting messed up while crossing a page boundary.

To get a nice large "hi-res" graphic on the atari, you have to take both sprite objects, tell the Atari to repeat them 3 times close together, and then stagger them.  (Imagine the 3 repeated planes on Combat, or the 3 players on Football. Then imagine 2 sets of those interleaved with each other) That gets you halfway there, but then you have to very exact timings to update the sprite's graphic data mid-scanline.  Because the Atari is so doggone slow, the timings are really tricky. (Although the technique eventually became fairly well-known -- any game with a 6-digit score display most likely used this technique).

I got the code all working thanks to that sample code I posted to above, but if I fiddled much with the graphics data, the timings would get off by 1 clock cycle, and it would fail. Turns out, again, that it was crossing a page boundary. This time with a LDA instruction (loading the accumulator from memory) -- if you do a "LDA foo,X" command, which loads the accumulator with whatever byte is at memory location (foo + the value of the X register), and foo+X crosses a page boundary from foo, it takes 5 cycles instead of 4.

Luckily the assembler gives you a nice "align" pseudo-opcode that lets you force alignment of your data into page boundaries, which fixed it.

After getting the title displayed, I wanted to make it pretty. I have 8 whole clock cycles free per line to do what I want with, but to update the color of the whole thing, I have to write to 2 registers (COLUP0 and COLUP1, the color registers for each sprite), which alone takes 6 cycles. There's not enough time left to pick or calculate the color for the scanline.

So I unrolled the kernel loop by half, which lets me use 16 clock cycles every 2 lines. That's plenty of time to load a base color, add to it based on the current line, and then write it to the color registers. The end result is a pretty animated title graphic:

Right now the PASSWD option doesn't do anything :-(

The half-unrolled loop ended up looking like:
.loop:
    sty     tmpVar              ; 3

    ;update the color
    tya                         ; 2
    adc     PlayerColorDef      ; 3
    sta     COLUP0              ; 3 = 11

    lda     (ptr+$0),y          ; 5
    sta     GRP0                ; 3
    lda     (ptr+$2),y          ; 5
    sta     GRP1                ; 3
    lda     (ptr+$4),y          ; 5
    sta     GRP0                ; 3
    lda     (ptr+$6),y          ; 5
    sta     tmpVar2             ; 3 = 32

    lax     (ptr+$a),y          ; 5
    lda     (ptr+$8),y          ; 5
    ldy     tmpVar2             ; 3
    sty     GRP1                ; 3        
    sta     GRP0                ; 3
    stx     GRP1                ; 3
    sta     GRP0                ; 3 = 25

    ldy     tmpVar              ; 3
    dey                         ; 2

    ;burning 3 cycles in place of the bpl since the loop is half-unrolled
    sty     tmpVar              ;3 (in place of the bpl)


    sty     tmpVar              ; 3

    ;update the color
    tya                         ; 2
    adc     PlayerColorDef      ; 3
    sta     COLUP1              ; 3 = 11

    lda     (ptr+$0),y          ; 5
    sta     GRP0                ; 3
    lda     (ptr+$2),y          ; 5
    sta     GRP1                ; 3
    lda     (ptr+$4),y          ; 5
    sta     GRP0                ; 3
    lda     (ptr+$6),y          ; 5
    sta     tmpVar2             ; 3 = 32

    lax     (ptr+$a),y          ; 5
    lda     (ptr+$8),y          ; 5
    ldy     tmpVar2             ; 3
    sty     GRP1                ; 3         
    sta     GRP0                ; 3
    stx     GRP1                ; 3
    sta     GRP0                ; 3 = 25

    ldy     tmpVar              ; 3
    dey                         ; 2

    bpl     .loop               ; 2/3 =  7/8

Saturday, January 16, 2016

Crossing Page Boundaries

For awhile, everything was working perfectly in my 3-enemy display kernel on Atari Anguna. Then this weekend, I added some new graphics (for the crocky boss monster at the end of dungeon 1).

Suddenly, things stopped working right. Enemies started jumping around horizontally instead of smoothly moving. It looked choppy and horrible. And all I did was add some new graphics data.

HUH?

Well, the issue was probably pretty obvious to any veteran Atari programmers.

On the Atari, when you reuse a sprite with a new horizontal position, you often get the weird black lines that appear on the left of the screen. I wrote a post about it awhile back, how if you write to the re-positioning register on exactly the 74th clock cycle the scanline, you'd prevent the line. If you did it earlier, you'd get the line. If you did it later, it might not HMOVE at all.

I've shown pictures of this before, but here's a sample of the black lines from doing the mid-frame HMOVE

Another important piece of the puzzle is the 6502's conditional branch opcodes. In general, they take 2 clock cycles if the jump wasn't taken, and 3 if they do. BUT if the jump passes a memory page boundary, it takes 4 cycles. (the 6502 divides memory into pages of 256 bytes each).

So it turns out, by adding additional graphics data, which ended up coming BEFORE my kernel code, it relocated the kernel code slightly, pushing one of my branches across a page boundary, and changing the clock cycle count of the routine by 1. Which made the HMOVE come too late, which made my re-position fail!

Well, the solution ended up being really easy, once I figured it out. Moving all the graphical data AFTER the kernel logic fixed it, and made sure that additional changes won't end up moving the kernel code.

WHEW.

And with that, I have most of a re-creation of the first dungeon of Anguna finished for the Atari. Since I had decided somewhere along the line that the first dungeon would be the same, but the rest would be mapped out differently, this means it's time to start doing level design again!

Fighting the Crocky boss. Like the GBA version, the Bow and Arrows make this fight easier!


Really, at this point, the majority of the game logic is done. I still want to add a title screen, game over sequence, maybe a subscreen that shows what items/keys/etc you have, maybe a password entry system (like old NES games) so you can save your progress, and if I'm not sick of the game by then, a shop where you can buy stuff.  Wow, that sounds like a lot when I list it that way....

Monday, January 11, 2016

Making things!

A few random updates:

  • My Life in Space game is done, I think. The Jam ends in about 5 days. I'm doing some last testing, and then will submit it. If anyone has an Android phone and wants to test for me, holler. It's pretty small compared to some of the crazy stuff that other people are doing for the jam, but I'm just happy to have a finished project that I think is interesting.
  • I'm finally about done with the crop insurance project, which means more time for hobby projects!
  • I've actually started working on Atari Anguna again in earnest. I'll probably be talking a bit more about that, but I've done a bunch of work on cleaning up my half-finished door code, fixed a number of small timing issues with my kernel, and even got the Bow and Arrow item ALMOST working!
  • I really liked having 2 projects at once with Robo-Ninja and Atari Anguna, so that means it's time to start thinking about my 2nd project.  Right now, the major options are either port Anguna to Android (using the C++ code that I had 2/3 finished from years ago when I attempted to port it to iPhone), or start on a NES game. I'm leaning toward the NES game, which means I might spend a lot of time here droning on about the interesting differences between the Atari and the NES.  (They both use the 6502 processor, but there's not much similarity beyond that!)

Saturday, December 19, 2015

Scene2d


Wow, the scene2d framework has come a long way since I first looked at it, in some pre-1.0 version of LibGDX. In the last hour since the kids have been in bed, I've got almost half of my game UI mocked out using it, and switching from the draft/mockup to the "real thing" should be as easy as modifying the skin file, and then slightly nudging/resizing things.
I'd show some code here, but it's all so plain simple, I'm not sure what to even say. It's all super simple layout stuff, along the lines of:
    private Window buildControlWindow() {
        float paddingLeft = 120;

        Window window = new Window("Signal", getSkin());
        window.setPosition(0, 0);
        window.setSize(LifeInSpaceGame.WIDTH, LifeInSpaceGame.HEIGHT / 3);
        window.setMovable(false);
        window.setResizable(false);
        Label label = new Label("Radio Filters", getSkin());
        window.add(label).padLeft(paddingLeft).colspan(3).expandX();
        window.row();

        Button filter1 = new TextButton("     Filter 1     ", getSkin(), "toggle");
        window.add(filter1).padLeft(paddingLeft).expandX().padTop(10);
        window.row();

        Button filter2 = new TextButton("     Filter 2     ", getSkin(), "toggle");
        window.add(filter2).padLeft(paddingLeft).expandX().padTop(10);
        window.row();

        Button filter3 = new TextButton("     Filter 3     ", getSkin(), "toggle");
        window.add(filter3).padLeft(paddingLeft).expandX().padTop(10);
        window.row();

        return window;
    }


This builds the panel in the bottom right that lets you apply different "radio filters" to the radio signal audio that's coming in from the selected star, to help you try to pick out whether there are any signs of intelligent life coming from that star.
The next task is going to be the first somewhat challenging one: to have a cool waveform image scrolling by on the bottom left side of the screen to match the radio sounds that you hear when you tap on a star. I have some ideas about how to make it work really easily, but it might take a little finagling. 


Here we have some rough instructions (which hopefully I'll have time fill out later)
And the addition of the radio filter toggle buttions. The waveform should appear in the space to the left of the buttons.

LibGDX Game Jam

So this week I'm tentatively starting a project for the LibGDX game jam, a month-long jam with the theme "Life in Space"

Part of the jam is the requirement to document your progress, which I'm doing on their website. I'll try to cross-post a lot of it here as well, but my jam project log page is at http://itch.io/jam/libgdxjam/topic/12031/gauauus-log

The idea of the game is a very short story-based game where you are a researcher here on earth searching through the stars looking for radio signals that would show evidence of extraterrestrial life in space.  Because of the non-action, story theme, it's very different than other games I've done. And because the goal is to crank something small out quickly, it's been fun (for the 2 hours I've worked on it so far) not worrying about good extensible/general design, but writing just enough code to get the job done.

I'll leave you with a very minimal draft screenshot. The top starfield is where you search for signals. The bottom will be a control panel that lets you analyze radio signals as they come in.

Can I do this in a month? I don't know, but it'll be fun trying.


Monday, December 7, 2015

Door work and more

Ok, enemy spawning finally works right. There were a couple of minor bugs in my spawning code that I last posted (c'mon, nobody spotted them? I thought with a million eyes, all bugs are shallow? I guess that means I have a few less than a million readers that are also 6502 assembly programmers!) But I got the bugs taken care of.

I decided the next step, to try to get my brain interested in this project again, was to go ahead and start actually making the first dungeon. Awhile ago I posted a survey to see if I should re-implement the maps from the original Anguna, or make a new adventure. Everyone voted for a new adventure. But it sounds really fun to try to reproduce the first dungeon, at least. So that's what I started on.

And immediately realized that although I had worked out proof-of-concepts for my door code, it wasn't finished. Doors on the top worked. I hadn't finished doors on the bottom. Which required going back and modifying my display kernel code, which meant I was back to counting cycles.

But I think I have that working, finally.

I also originally only allowed for a left-side or right-side to be closed (if I wanted them both to be closed, I had to draw the room map with a permanently closed wall, which reduced that room layout's flexibility for use in other rooms).  But after playing with that, I didn't like it much. So I had to re-think how this was going to work.

Originally, I used the Atari "ball" graphics object, (which is a 1,2, or 4 pixel blob) extended vertically across the whole screen, to block off a left-side or right-side door. But if I wanted to block both at once, this wasn't going to work. (there's only 1 ball!) So instead, I counted and realized I had time to squeeze in one additional instruction in my code that pushes the background data to the right registers, so I could pre-load a byte in ram with a mask to be applied to the walls, and, OR that with the actual room wall data before pushing it to the display registers. Because I'm using a mirrored background, that could close both the left and right doors at once.

Both the left and right doors are closed! Hooray!


The next step is another part that I realized I never implemented: if you have a secret door that only opens when all the enemies are dead....well, it never opens.  Not because my code to open it doesn't work. But more because it turns out I never wrote that code.

So that's next!


Thursday, November 19, 2015

Enemy Spawning

Still working on Crop Insurance. The one nice thing about it is that I'm tracking my hours, which lets me see a better estimate of how much time I spend on my side projects. The answer is about 5-6 hours per week.

No wonder it took 3 years to finish Robo-Ninja.

That being said, I'm feeling a bit stuck on Atari Anguna. I haven't been doing much, because when I do, I've been working on my semi-random enemy spawning routines. And I haven't been happy with it.

The issue is that I don't want enemies spawning stuck in walls, which means:

1. I can go completely random on spawns, but then if it's a collision, try again.
1b. To check for a collision, I either have to do the math to figure out if I've collided with a wall (which on the Atari is non-trivial due to the crazy arrangement of the playfield registers) or
1c. Draw the enemy once, check the collision registers, and then move (which means each try eats up a frame, which could be slow and look really tacky)

2. Instead, I could designate "safe spawn" areas in each room layout.
2b. Depending on how I do this, it could eat up quite a few bytes per room. (I potentially need at least 3 safe spots per room. This could be 6 bytes per room, more than I want to spend)
2c. I could cut down on rom usage by having a lookup table of safe spawns, the question is how this would work, and doing the randomization and lookup in a way that's fast and compact.


I spent WAY too long thinking through these, testing ideas, etc, and not being happy with the results. Which made me less interested in working on the game, and thus slower progress.

Finally I have a solution that I think I'm happy with, and seems to be mostly working.  I build a lookup table of 8 potential spawn points (16 bytes for the lookup table). Then each room has a byte to tell which of these potential spawns are allowed for each room layout -- a 1 means it's safe to spawn in.  Then I pick a random number between 1 and 8, check that bit. If it's not safe, try the next. Once I get a safe bit, spawn an enemy at the position that the bit refers to. Then if there are more enemies to spawn, I just check the next consecutive bits (instead of picking more random numbers, and risking enemies spawning in the same position as each other) until I've spawned them all.

It seems to work, doesn't require much storage, and is relatively fast.

For any 6502 assembly nerds, here's the code I used. You can probably spot all the places that I'm doing things really badly (I end up wasting a lot of cycles saving and loading values -- it seems I just don't have enough registers to track everything I need and still use X and Y for indexed loads (Why oh why didn't the 6502 have TXY and TYX opcodes to move values between X and Y directly?))

LoadPositionsFromSafeSpawnsImpl
    SUBROUTINE
    ;TempPF2 should be the number of enemies we want to spawn
    ;TempPF2 then holds the number of enemies we want to spawn - 1
    dec TempPF2

    ;load the room index
    ldy #0
    lda (RoomDef),Y
    tax
    ;x now has room index

    ;Store #1 in TempPF1 to bit against..
    lda #1
    sta TempPF1

    ;get random number between 0 and 7
    lda Rand
    and #%00000111
    tay
    iny

    ;a has safe spawns
    lda SafeSpawns,X

    ;rotate the safe spawn based on the random number
    sty Temp
    ldx Temp

.keepRotating
    cmp #$80
    rol
    dex
    bne .keepRotating

    ldx Temp
    ;now work our way through seeing if it's safe
.checkSpawnLoop

    ;if it's safe, go to useThisValue (of x)
    bit TempPF1
    bne .useThisValue

.beforeRotation
    ;if not, rotate again, increase X
    cmp #$80
    rol

    inx

    ; if X equals start, fail. What then?
    cpx Temp
    beq .useThisValue

    ; if X equals 8, set to 0
    cpx #8
    bne .checkSpawnLoop
    ldx #0
    jmp .checkSpawnLoop


.useThisValue
    pha
    ldy TempPF2

    ; otherwise, look up X and Y in table
    lda SpawnsX,X
    sta Enemy0X,Y

    lda SpawnsY,X
    sta Enemy0Y,Y
    pla

    dec TempPF2
    bmi .allDone

    jmp .beforeRotation
.allDone

NES Anguna

Well, I had a little bit of time still, while Frankengraphics is finishing up her game Project Blue, to have a little downtime on Halcyon, s...