Monday, December 29, 2014

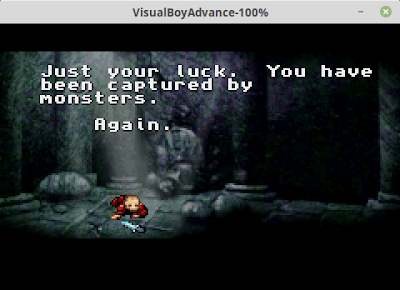
Worst intro cutscene ever?

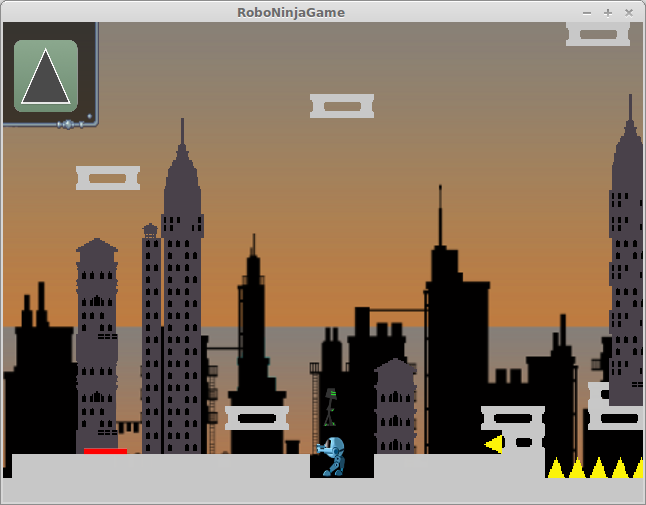
It's a toss-up which is worse, the intro to Bad Dudes, or the intro to Robo-Ninja.  I'll let you decide:

Bad Dudes:


Robo-Ninja:


Tuesday, December 23, 2014

Condensing my room definitions

I recently realized that I was doing it wrong in my room definitions. Previously, I was storing the addresses of each section of background wall data, like:

TestRoom
    .byte #<TestRoomLineDefsA   ;background definition.
    .byte #>TestRoomLineDefsA   ; The < and > signify low and high bytes of 
    .byte #<TestRoomLineDefsB   ; the pointer address.
    .byte #>TestRoomLineDefsB
    .byte #<TestRoomLineDefsC   ; Atari backgrounds are made up of 3 chunks
    .byte #>TestRoomLineDefsC   ; of data which is why there are 3 pointers.
    .byte #ROOM_COLOR_BROWN     ;room colors
    .byte #ROOM_COLOR_GRAY
    .byte #TOP_CLOSED           ;door flags 
    .byte #<EnemyDefSlime       ;what enemies are in this room
    .byte #>EnemyDefSlime
    .byte #3                    ;number of enemies
    .byte #NO_ITEM              ;any special items in the room


That's 6 bytes for each room that are used to point to the background data. Realistically, there's no way I'm going to have more than 255 different room backgrounds. (There's just not enough ROM space for it), so an int Id seems to make a lot more sense, with the assumption that all 3 sections are always going to be used together:

TestRoom
    .byte #ROOM_STARTING
    .byte #ROOM_COLOR_BROWN
    .byte #ROOM_COLOR_GRAY
    .byte #TOP_CLOSED 
    .byte #<EnemyDefSlime
    .byte #>EnemyDefSlime
    .byte #3
    .byte #NO_ITEM

Doing so, I've cut the space required for a room definition in half. That means I can have twice as many rooms in my game before I run out of space. I think that's worth it! If I get around to it, I could cut out another byte per room by changing the Enemy Definition pointer to an ID instead of a pointer, but I'm not sure it's worth the effort just to save a byte per room. We'll see how desperate I get for space by the end, though.....

Sunday, December 21, 2014

Closed, locked, and fake doors

To be somewhat true to the GBA version, Atari Anguna needs doors: doors that open with the right colored key, doors that open when all enemies are killed, and fake walls that don't look like doors, but allow you to walk through them. Plus, since I'm reusing room wall layouts to save cartridge space, I want the ability to say "use room XYZ but seal off the left door"

This was the new challenge this month. I had to find a mechanism for dynamically drawing doors. The general idea would be just to fill in the "door" opening in the wall with more wall -- either some other color for a locked door, or with the wall color for sealed or fake walls.

The trick is dynamically doing this. The top and bottom walls/doors weren't too bad. I made a rule that no enemies will overlap those scanlines, and, by writing separate kernel code for those lines, gave me enough time to modify the background dynamically. It's easy enough to just modify the "background color" (not the color of the walls, but the backdrop) to either match the wall color or be the lock color, just for those few scanlines, then change it back.

The left and right walls are trickier. I don't have time on each scanline to fiddle with things. (And there's not enough ram to write all the room data to ram before rendering, modify it at that time, and then render from ram.)  Luckily I have one more Atari graphics object that I can use: the ball.

The Atari, which was pretty much made to play Pong and Combat, supports 2 sprites, 2 missiles (which match the sprites in color, and are little more than a dot, square, or line, depending on how many scanlines you show them), and a ball, which matches the playfield's color, and is also just a dot, square, or line.

The fact that the ball matches the playfield color makes it easy -- before the frame, I set it up for the ball to display either at the left, right, or not at all, then don't touch it -- it will keep displaying on each scanline, and make a nice looking wall on the right or left. I had to modify my collision code to check for collisions with both the ball and the walls, instead of just the walls, but that was straightforward. The only hitch I've run into so far is the ball collision always takes priority over the wall collision, so for a "fake" wall, the whole wall becomes fake (as the game detects a collision with the ball, which is determined in this case to be a non-blocking collision) instead of just the small portion where there's a hole in the wall.

So far I've got the left and right doors working, and the top doors. I just need to write the kernel code for the bottom door, and I can knock doors off my checklist.

(And I've got about 3 more blog-posts worth of content from the past month that I haven't gotten around to posting about, so maybe I'll find time to write them soon!)

Sunday, November 16, 2014

Moving Right Along

Both Robo-Ninja and Atari Anguna have been moving forward the past few days, although I haven't had much interesting to say about them.

On Robo-Ninja, I've finally gotten far enough along in the mapping where I can finally assume that, by this point, the player has most or all of the powerups from the first 2/3 of the game. Meaning I can finally switch up a lot of the level designs to force all sorts of difficult combinations and toggling of abilities.  For example, in room "cave_10":


If you can follow my horrible paintbrush drawing....you start dropping down at the purple arrow on the right. You have you double-jump at the blue part, and while in the air, change the "ground action" ability to slide instead of jump, so you can slide under the wall (orange). Then immediately toggle back to jump (and make sure your wall ability is set to wall jump) to handle the yellow jumps. Then you have a very short stretch to toggle your in-air ability from double-dump to the "slam down" ability, so you can slam and avoid the spikes (red).  This only took me about 25 or 30 tries in testing, so I figure the challenge level is about right :-)

(Of course, I was purposely avoiding using the slow motion powerup, which I'd expect somebody to use at this point. Especially because I put one at the gray square there near the beginning, to make sure you have at least one, and to remind they player that it exists)

I'm still putting off my work on the title cutscene though. I just keep thinking it's going to be a lot of work for what amounts to be a really ugly-looking cutscene.


In Atari Anguna land, I've been working on the transitions between rooms. This means fleshing out my room definition code (which previously only had the wall definitions) to also include color scheme, what enemies are in a room, any special state for doors (requiring a key, requiring all enemies to be killed, fake walls, etc), and what item rewards might be in a room.  So far, I'm only as far as colors and enemies. Just tonight I got it rigged up so enemies spawn semi-correctly when you move from room to room.

The part I need to figure out next, is the best way to randomly distribute the enemies in a room, but without spawning them in a wall. Do I randomly drop them in, and if it's a collision, try again? This could take a long time in rooms with a lot of walls. Or do I drop them in, and try nudging them around until they don't collide? That could give really weird results, if I nudge them the wrong way. And what's the best way to detect collisions as I'm spawning them? Trying to compute the mapping between screen coordinates to wall collisions is hard on the atari, it's WAY easier to let the collision detection do it, but that only happens once per frame. So do I do the math myself, or do I waste a bunch of frames trying to arrange my enemies before the player is allowed to play the level?

I'm sure I'll figure it out, but my brain is too tired to properly answer those questions right now. (although I'm leaning toward repeatedly random dropping them in, but giving up after 10-15 tries. And I think I can make the background, walls, and enemies all be the same color as I'm trying to position the enemies, so if there's a 1/4 or 1/2 second loading per room, at least it won't look stupid with the enemies bouncing around trying to get positioned.  (But I'm not 100% sure that that will work))

Monday, November 10, 2014

Rumination on design and global variables

I had an interesting observation the other night. Switching back and forth between Robo-Ninja and Atari Anguna makes me much more aware of the differences in how I write code.

For example, when writing code for enemies in both games, I often need to know about various pieces of state that live outside the enemy -- such as the position of the player. (But not limited to the state of the player, which is what makes this tricky). In a game designed with a modern language and architecture, you have to make a lot of decisions about how you both provide and limit access to the state that the enemy would need. How do you expose certain state to the enemy, without giving it access to all sorts of things it shouldn't have access to?  There are lots of solutions to that problem, but it's a big part of thinking through the design of a system. (Tangent: I find this to be tricky in hobby-style video games, because I'm always dreaming up new enemies and mechanics that require access to things I hadn't planned on. I then sometimes get in a hurry and provide access in the easiest way possible, instead of taking the time to rethink what might be the best design for the future)

For Atari Anguna, on the other hand, everything is fair game. 6502 assembly by default makes all your variables global. In theory you could probably use some discipline to localize variable use, but you really don't have processor time to waste using any sort of accessor mechanisms anyway. Practically, everything has access to everything else.  With these constraints, many of the rules of good design get tossed out the window by necessity.  Which is strangely fun and freeing. An enemy needs to know the player's state? Just read it directly.  Who cares about loose coupling, orthogonality, and all that other stuff?  It feels dirty (and would be a disaster in a larger, more complex program), but for something small and compact like this, just adds to the fun.

Friday, November 7, 2014

Sound effects

The past couple nights have been devoted to getting sound working in Anguna 2600. Unlike video, sound is actually pretty easy, as long as you aren't too picky and don't want it to sound like much. There's 2 sound channels, each one having 3 registers: one for volume, one for waveform (one of 7 or 8 presets), and one that controls frequency. Trying to get any particular notes or scales out of it is near impossible, but getting rough sound effects is pretty easy.

Although I spent way too long last night fiddling with it before realizing that I couldn't set the sound registers before the first video frame for some reason. When I did that, everything locked up. I'm still not sure why, I couldn't find any reference to that in the documentation. Oh well.

My first successful test was to pick a semi-random waveform (#4, which is basically a simple square wave), and tie the frequency to the player's X position, to test it out. This ended up accidentally producing the exact sound effect used in Yars Revenge when the Qotile starts spinning and is about to jump out and kill you. (see this google+ post where I have videos comparing the two).

Tonight I sat down to actually build the sound system for the game. I wanted to be able to do a simple "PlaySound #SOUND_SWING_SWORD" type of command, fire and forget, and have the sound engine do the rest (select which channel to play based on which was busy, start playing the correct sound, and turn off that channel after the right amount of time). Oh, and I wanted to have the sound engine use up no more than 2 bytes of RAM.

Which actually, ended up being not too difficult. I use 1 byte of ram for each channel. The upper 3 bits are used to track which sound ID I'm playing (so I only get 8 sounds possible), and the bottom 5 bits are a timer to track when it should be shut off. Each frame I decrement the timer, then go through the assembly equivalent of a big switch-case block to see what wave and frequency values should be set for that sound. If I want to later set it up so that one sound leads into another (ie one sound effect that has two tones in sequence) I can just build that into the giant switch statement, without having to take up more RAM. And if I really need more than 8 sounds, I can designate certain sounds that would belong to each channel. That would mean certain sound effects could never play at the same time, but if I really come up with that many sounds that I want to play, I think I can deal with that limitation.

Right now I have unpleasant sounds for when the player swings his sword, when you take a hit from an enemy, and when an enemy takes a hit. That's the majority of what I need, so for now, I just need to play around and pick better waveform/frequency values for those so they don't sound stupid, and I should be good to go.

Then it's on to building doors that open and close based on game conditions (# of enemies alive, keys in inventory, etc) as well as secret doors that look like walls but that you can walk through.

Wednesday, November 5, 2014

Enemy Wall Collisions Working

After much mucking about, I finally have the enemy wall collisions working. My general algorithm that I mentioned before was mostly correct, but it needed a little tweaking. The way it works now is:

  1. Check if there was a wall collision last frame. (which would only occur if the enemy was actually drawn!) If so, reset to the "last drawn" position.
  2. If no collision and enemy shown, copy the current position to the "last" position
  3. Move the enemy
  4. Determine which enemies will be shown this frame. If shown, copy "last" position to "last shown" position
  5. Clear the collision flags
  6. Redraw (and capture changes to the collision flags)

The part that really threw me off was the bold part in step 2. I was copying the current to the "last" position even if the enemy wasn't shown, which, once I worked it out on paper, turned out to let the enemy advance slowly through a wall. But it all works now!

Once that was finished, I also managed to nearly recreate my slime "AI" code from the GBA version, so that was a good test to make sure my design is holding up well. ("AI" is in quotes as the there's no intelligence about it, but that's the best label I have for the bit of code that tells the slime how to move around)

So I think I'm finally done with the very core of the game, and it's time to move to other fun things, like transitioning through rooms, adding sound, allowing for alternate items, etc.


And lest I forget Robo-Ninja, I've cleaned up the cutscene a little, but I'm stuck trying to figure out how to animate, with my limited art skills and free internet art, Dr Squidbrain capturing Prof Treeblot. I need to think of a way that doesn't look stupid, but doesn't really require more frames of animation than I have.

I also started back into level design, which is always a nice diversion when I'm stuck. The past couple of rooms felt a little uninspired, but I'm almost to the point where I can expect the player to have a large set up powerups, so I can start designing new sorts of challenges that require quickly switching between powers. That should be fun.

Sunday, October 26, 2014

Getting stuff done...

So I got a lot done this weekend (not counting the work I did on my back porch, but this isn't a home improvement blog, so....)

  • I got the basics of the scripting system working for cutscenes in Robo-Ninja. I reworked my original design slightly (to put the entire script in a single file, instead of a different script for each "puppet" in the scene). I still need to flesh out a number of the script commands, but I have a very ugly basic cutscene working, where Robo-Ninja stands there as Prof. Treeblot walks away from him, and then a buggy half-broken Dr Squidbrain shows up.

  • On Atari Anguna, I did some thinking, and realized the way I had written 3 completely separate kernels was dumb. I managed to rework it so that the the smaller, simpler kernels were just subsets of the bigger more complicated kernel. They are a couple cycles slower, as I had to add a branch to possibly jump out of the kernel loop for the smaller kernels, but I managed to squeeze the branch into a spot where the timing wasn't as critical. So that saved me a good 500 bytes (1/8 of a bank, or 1/16 of my total rom space). If nothing else, that frees up space for at least 6 more room layouts. (to allow for more total number of rooms, I'll reuse the layout data across multiple rooms in the game)

  • I also got my bankswitching scheme all set up, so that the main game logic happens in one bank, and the display kernel and graphics data lives in the other bank. This was a little messy because I originally divided my code into separate files, based on what sort of game element each file was about. So I had a file for enemies, a file for backgrounds, a file for the main player, etc. But by default, the assembler just lays out everything sequentially in memory. So I had to do a little bit of rearranging to make sure that everything was declared in the right bank. (There was one small set of data, used for positioning sprites, that I ended up having to include in both banks, so I hardcoded its location, so that it was in the same place in both banks).  The fact that I mostly use macros to break up my code (instead of actual subroutines) make it a bit easier, as the macros get substituted inline where you call them, instead of existing where you declare them.

The big thing that annoyed me this weekend is realizing, once again, how slow development is, when you don't have much time to put into it. Often I've only got about 30-60 minutes of useful brain function left in my spare time in the evenings, before I get too tired to do anything useful. It's just hard to get anything done in that time. (which is partially why I like blogging about it -- it takes less brainpower, so I can do this during that weird gap of time where I'm not quite ready for bed, but my brain refuses to produce more code.) I guess if I only had 1 project instead of 2, it would move faster. Although I've really enjoying the fact that I have 2 options. If I get bored of one project, I just swap to the other.

Ok, my brain is fully shutting down now....

Tuesday, October 21, 2014

Kernels, enemies dying, and bankswitching

So for the past couple weeks, I've been putting off working on Atari Anguna because I've been up against a bug that sounded difficult and boring to solve: whenever I killed an enemy, it messed up my kernel logic, and everything went haywire.

What's supposed to happen, is that every frame, I sort my enemies by Y position, and then compare all their Y values, select the right kernel mode, then draw them in order. If an enemy is dead, I'd sort it to the end, and select kernel modes that ignored that enemy. But it wasn't working.

I sat down to tackle this today, and happily, it only took about 10 minutes. It was a simple logic error in my sorting routine, which occasionally caused a dead enemy to get sorted to the front of the list.

(Tangent time! I ended up using a *gasp* Bubble Sort for sorting these enemies. Why? Because I realized that for N=3, which is my case, Bubble Sort only requires 3 comparisons (a/b, b/c, a/b again). So it's a really simple sort to implement, and if I'm guaranteed constant time, then hey, why not. The bug I ran into was that if the enemy in the first position of a comparison was dead, I'd always swap, but I forgot to check if the enemy in the 2nd position was dead, and refuse to swap in that case.)

So tonight I also realized that my kernel was working for 3 enemies as long as 2 of them overlapped, but I never had gotten around to implementing my kernel mode for 3 completely separate enemies. That's really simple and straightforward, but requires a good bit of compiled-code, as I'm using macros instead of subroutines (I can't afford the 6 cycles for the JSR and 6 more cycles for the RTS during my kernels!), so in the compiled code, there's tons of repetition. Well, this created a new problem: I've now almost used up my entire 4K of ROM.

Now the geniuses back in the 80's solved this problem with bankswitching, which is what I now have to figure out. Basically, there are 2 entirely separate blocks of ROM that you can switch in and out of actual ROM. This gives you double the space, but gets tricky. For example, as soon as you give the command to switch banks, it immediately switches. Meaning the instruction pointer is now pointing to the memory location of the next command, but in the other bank. So you have to make sure to line up your code just right, so that when you toggle banks, the code in the new bank picks up and runs where you left off. (And when you power on the Atari, you don't know which bank you're in. So both banks have to have identical initialization routines, so you can get yourself into a known state!)

I think I've got the basics working now:
In both banks, I have an almost-identical routine where I manually load a target address (the target address of a routine in the other bank that I want to execute) onto the stack, simulating what would happen if I had jumped to a subroutine with JSR. Then I toggle banks, and immediately RTS, which makes the Atari try to return from the subroutine, and jump to the target routine in the new bank:

    ORG $D009    ;Bank 0 uses a "pretend" address of $D000
    RORG $F009   ;but a "real" address of $F000
                 ;(The actual Atari ROM is always $F000) 

JumpToOtherBank
    LDA BANK_2   ;Reading this register switches banks
    RTS          ;and then jump to the location on the stack

;;;;;;;;;;;;;;;;;;;;;;;;;;;;;;;;;;;

    ORG $E009    ;Now the same thing for Bank 1
    RORG $F009    

JumpToOtherBank
    LDA BANK_1   
    RTS          

;;;;;;;;;;;;;;;;;;;;;;;;;;;;;;;;;;;;;;

; And then a macro to make it easier to set up
; and call the JumpToOtherBank routine

        MAC BankJump 
            LDA #>{1}   ;push the target's MSB onto the stack
            PHA
            LDA #<{1}-1 ;push the LSB (minus one*) onto the stack
            PHA
            JMP JumpToOtherBank ;then call the magic routine

        ENDM


* I spent a good while fighting this code until I realized I needed the "minus one" on the least-significant-bit. Turns out JSR pushes one less than the address of the next command, and then RTS pulls that from the stack, and increments it. So I was 1 byte off when I'd try to RTS, which was breaking everything horribly.

I still need to actually break my code up into the different banks now. I'm hoping to fit the kernels and graphics data in bank 1, and everything else in bank 0. But we'll see.

And I still need to actually test my full kernel for 3 separate enemies. And do the enemy-wall collisions that I've been planning for weeks. But bank switching is more fun.....

Thursday, October 9, 2014

Jetpack and death counter

Tonight was back to Robo-Ninja. First, to make Aaron happy, I went ahead and created the jetpack item. He's been wishing for that non-stop for months, so I thought it would be a fun surprise to add for him. Plus, it was one of those few times that something was really easy. It helped that it's so similar to the double-jump item in function.

Then, I felt like doing something different (the scripting stuff, while interesting, required some serious thought and design work, which I didn't feel up to tonight), so I added something I've been planning for awhile: the death counter. What good is a hard game if it doesn't regularly remind you about how bad you are at the game?

With Anguna, when I released it, I had a little contest, where the first person to win the game with 100% of the hidden items being found, won a free copy of the game. It was a fun way to drum up some interest and attention. (and was fun from my end -- the 2nd place winner was only a few hours behind the real winner!)

I'm thinking about doing something similar with Robo-Ninja if I ever finish. To have a contest to see who can win with the fewest deaths. I'm not sure what the winner will get, but hopefully it will tempt a few crazy people into actually finishing the game. We'll see. (Realistically, I'll be lucky if I can get more than 5 or 10 people to actually notice and download the game. But hey, whatever).

Monday, October 6, 2014

3 enemy kernel (getting close!)

Spent awhile tonight working on trying to get my 3-enemy kernel working for the atari game. It basically amounted to a ton of branches, checking to see which enemies were close, which frame I was in, etc.

Basically, I have to see which enemies are close to each other vertically, pick the appropriate kernel (whether to render 1, 2, or all 3 enemies), then swap around the enemies in the enemy array to make sure that the correct enemies are rendered for this frame (since enemies that overlap a row only get rendered on alternating frames).

So tonight was my first pass at it. It works in a few of the cases, but completely freaks out in a few of the arrangements. So now I get to start the fun job of isolating which cases fail, and debugging. This should be fun.

Wednesday, October 1, 2014

Robo-Ninja Puppets

So now on Robo-Ninja I have the fun little diversion of figuring out how to do the scripted sequences for the beginning and ending stories. It will consist of little more than a handful of characters (Robo-Ninja, Prof. Treeblot, and Dr ?, maybe a robot guard) moving around and having word bubbles over their heads.

But I need a nice way of scripting it.

So that's what I'm currently working on, which is fun because it's a different sort of thing. I decided to not go all out and embed a lua interpreter in my game, but I AM making a super-simple script language that I'll run for each character.

I've extended my GameCharacter class (which handles drawing characters, animated them, detecting collisions with other characters) to create a new class that follows a script. Now I just need to actually implement the script system (and parser!)

I haven't finished planning it out fully yet, but I'm envisioning something like:

2.5   moveto 132,234
1.5   say    This is text that he will say!
1.5   wait
2.5   moveto 132,234
Where the first number is the amount of time to spend doing the action, the next token (separated by whitespace) is the action to take (I'm not sure I need much more than those 3 actions, unless I need some way to specify additional animation frames that a character should do (ie facial expressions?)). The moveto command should be smart enough to move at the right speed to take the amount of time specified on the left. And be smart enough to make sure the character is facing the right direction, showing the "walk" animation, etc.

Now I just need to sit back and think about whether I'm missing anything important. (And I'm still trying to decide if instead of a "wait" command I should include absolute start times on each command. That would be more complicated for me if I had to rearrange and re-time everything, but it might be easier for keeping multiple character's script information in sync. I'll still have to think on that.)

In other news, I got my Atari enemy display kernel working with 2 enemies right now. (No wall collision detection yet though). I'll see if I can get that 3rd enemy working, then try to tackle the collision detection.


Tuesday, September 23, 2014

No, I was wrong

The morning after I posted that last post, I realized my "simple solution" was wrong. Because I can't determine if an enemy is showing on a frame until after I've moved all the enemies for that frame. So I really do need to save 3 sets of previous X/Y coordinates. That's 6 whole bytes of my 24 remaining.

I don't like it. But I'm not sure I have any options.

Sunday, September 21, 2014

Multiple Enemies

Ok, now I need to talk about getting multiple enemies on the screen in Anguna 2600. Time to write a novel here.

A little bit of background first: The atari is designed to only show 2 sprites on the screen at once. (although each one can be doubled or tripled horizontally) But, because you can change things up every scanline (if you are fast enough!) you can reset the sprites every few vertical lines, to make a number of things happening onscreen, so long as you commit to spacing them out vertically. Which is why so many games had rows of sprites in their own little lanes on the screen. Classic examples are Freeway and Space Jockey:


In each of these, the player is one sprite, and sprite 2 is reused over and over vertically (in freeway, you can see the various options for duplicating the sprite horizontally)

But things get messy if you want to try to show more sprites than that on a single line. There are a few crazy tricks (you can place both sprites next to each other, triple them, and then update the graphic data on the fly as the scanline moves across the screen. But that pretty much takes ALL your processing time, so you can't do anything else as well). Or you can do what pac-man does with the ghosts, which is draw alternating sprites on different frames. With this technique, you could theoretically draw as many sprites as you wanted, but since you're only drawing a couple of them per frame, they get more and faded the more you draw (on pac-man, I believe each ghost is only drawn every 4 frames!)

My goal with Anguna, if I can figure it out, is to allow 3 enemies onscreen at once. What I hope to do, is adaptively adjust how I draw them, depending on the current screen layout.  If they are all spaced out nicely, in different vertical locations, I'd just draw them separately, like space jockey or freeway. But as soon as 2 (or more) of them would overlap vertical positions, I'd start fading and alternate drawing them.

That way, it wouldn't be a faded mess most of the time, but I could degrade to fading when necessary. The tricky part of this is that I'd basically have to write multiple different display kernels, and choose the right one accordingly (there's not enough time during the tight display loop to branch and handle the different cases, so I'd have to write separate (but mostly similar) display loops, and pre-select the right one before drawing. I'm not sure if I'm smart enough to pull this off.

The other problem I foresee is going to be collision detection. The one relatively easy thing the Atari 2600 gives you is built-in pixel-level collision detection. You can read a register to see if your sprite collided with the playfield walls. Or with another sprite. Or a missile. Or the "ball" (the only other on-screen object that the Atari provides besides 2 sprites, 2 missiles, and a playfield). The Atari automatically sets the values of the collisions registers as it's drawing, whenever the TIA (the fancy Atari display chip) actually draws the collision.

Which causes problems when I'm fading enemies. Because an enemy-wall collision might only be detected every 3rd frame (if all 3 enemies are on the same row, so I'm having to alternate drawing them). I still want them to move at regular speed, but if they run into a wall, they have to back up to their previous location. I previously was saving the player and enemies "last location" along with the current location, so I can revert to that in the case of a wall collision.

But with my plan, with enemies, I'll have to store the last position from the last time they were actually drawn. (as that was the last time that I knew they weren't colliding with a wall) But I don't know for sure if they'll be drawn this frame, until after I move them. It's not a terribly complicated problem, but requires keeping a little bit more data in ram to sort it out. Which I don't have much of. The Atari gives you 120 bytes of ram (for both variables and your stack!). I've used up most of that already, and only have about 24 bytes remaining, which I'm greedily guarding.

Ok, actually, the process of just typing this up and explaining it made the optimal solution pretty obvious to me -- I can do this using just 2 more bytes of ram. I just need to temporarily store the last X and last Y for an enemy in a temporary variable, before I move them. Then, if I've decided I'm drawing that enemy, copy that those temp variables to the actual lastX and lastY for that enemy. I can reuse those temporary variables so that I don't have to allocate more ram than that.

Ok, well, now that I've scared off any readers that I may have still had, I think I'm done for now. It was worth it just to make me organize my thoughts enough to solve that silly problem.

Playtesting and rearranging

Last night I finished a big section of the RoboNinja world map, and so I decided this was a good time to do some serious playtesting. I loaded up the game onto my phone and got to work. (at which point I noticed that my free trial of my vm hosting where I had my jenkins server had expired, so I need to figure out a replacement. I need to find something that can do Android builds, a place to push and host binaries, and all that without spending much money!)

It took me around 30 minutes to play through all the content that I currently have. Most of it worked fairly well, and played like I expected. There were a few spots where somehow the phone played just differently enough so that it was harder on the phone than it was on the desktop version, which will need to be fixed. (At one point in particular, I kept respawning inside a wall, which never happened before on that map).

The biggest thing that I realized had to do with the section of maps that I just finished. It's a rather long excursion that leads fairly linearly to a single item. You play through a bunch of moderately difficult maps, to be rewarded with the wall jump item (which lets you jump upwards off walls). Unfortunately, this is a bit underwhelming. It seems cool, but doesn't really change the way you play the game all that much. Compared with the double-jump item (where you can do another jump mid-jump) that you find a few screens earlier, which completely changes everything.

So I decided it was time to swap them. Which meant I needed to play through that part of the world again, to make sure that the challenge/balance was right (and actually possible) without having to get one before the other. (Turns out, no. There was one place where you had to have the double-jump or slam item to be able to make a jump. So that needs to be fixed).

So now they are all swapped around. And the first half of the game world is complete. We're getting there!


Monday, September 15, 2014

Anguna 2600

I just spent a week traveling for a work conference. Between the 8 hours of flying, and a few nights in my hotel room, I got a lot done. Both on Robo-Ninja, and my Atari project.

On Robo-Ninja, I got through a few more maps, added a new enemy that flashes a "bright light" which temporarily blinds you from seeing the room you're in, and started working on a scripting system for animating my intro and ending story sequences.  I'll get to all that in more detail later.

On my Atari project, I finally have it looking and acting somewhat like an actual video game. There's still a ton to do (finish collision detection, rewrite my display kernel to allow 3 enemies onscreen at once, allow you to switch rooms, add sounds, etc, etc, etc), but at this point, I've been vague long enough: my goal is Anguna for the atari. It's going to be pretty primitive, but I think I can make a passable version of the game for the 2600.


I've got a number of interesting (to me!) things to talk about regarding the game: the challenges of getting the top header bar working, my strategy for multiple enemies onscreen, how I may have to end up using bankswitching to allow for more than 4K of ROM, how collision detection works on the atari (one of the few things that's easy!). But it's late, so I'll leave it with that picture for now.

Thursday, August 28, 2014

Levels, levels, and more levels

The past couple weeks I've been focusing on making new maps.  At this point, I'm done with the temple zone, and almost done with the industry zone. 

I think I mentioned that I've added a couple of new items -- the "wall slip" and the laser that Robo-Ninja can shoot out of his eye-holes. I thought that might give me a fun programming break from designing maps. But fortunately, it turns out that I actually designed properly for these things, so they were really easy to add. The wall slip, in particular, only took about 15 minutes, by reusing what I had from the wall cling. The laser took a little while longer -- not because the laser itself was difficult, but I had to add functionality to the enemies that lets them die when hit. Either way, it was all straightforward based on the code design.

So back to editing maps. Robo-Ninja's world is starting to grow out a bit, although there's still a good way to go.  I think it's time to stop for awhile, so I don't get burned out and starting making stupid levels, and instead start writing the code for the opening story sequence. That will be interesting to write. 

I hope.
 

Sunday, August 24, 2014

Atari kernel vs Android

So tonight I split some time between writing code for a couple of new items in Robo-Ninja (the laser gun, and the "wall slip", where you can cling to and slowly slide down a wall), and working on trying to jam pack everything into my Atari "kernel" (the name they call the core display loop on atari games).

The contrast between the two was hilarious. I'm going slightly over my cycle count on my Atari kernel -- once I added code for displaying missiles and background, I'm taking too much time per scanline.  But I don't really want to cut any functionality out, so I've been tweaking and optimizing, trying to pare down an instruction here, an instruction there. My brain is now tired. I managed to squeeze it down to ALMOST small enough. Squeezing the rest is going to be pretty difficult.

Then back to Robo-Ninja. Writing in Java (instead of 6502 assembly!), not really worrying about performance unless I do something stupid. I can waste lines like crazy, and it doesn't really matter at all.

Weird.

Wednesday, August 20, 2014

Atari craziness

So between making more maps for Robo-Ninja (I finished the rest of the Temple zone yesterday!), I'm still playing with my side-SIDE project of learning Atari programming.

Let me just tell you, that machine is insane.

On most modern hardware, drawing game graphics is a matter of setting up a scene in openGL, (or  often, some framework that abstracts away the openGL and lets you tell it what stuff to draw where).

On the GBA, it was a little harder. You had magical memory registers for video ram, which you'd fill up with appropriate graphics, you'd poke palette data into a different register, then you'd have other  registers that told it how to build and display sprites or background tiles based on all that. You could, for example, fill in a register to say "put a 16x16 sprite, flipped horizontally, at position X,Y, based on graphic data at video ram location FOO" You still had to do a good bit of work figuring out how to swap data in and out of the limited video ram, how to update slices of the background tile data to make it look like the screen was scrolling, etc, but it wasn't too bad.

On the Atari, you have to hold the thing's hand THROUGH EVERY TV SCANLINE.  To position a sprite horizontally, you literally have to wait until the scanline is at the right place and say "DRAW IT NOW!" Which is tricky because the only way to track how far you are into the scanline is to count the processor cycles of every assembly command, and know that the scanline advances X amount for every cycle. You only get 76 clock cycles per scanline, which is only around 30 assembly instructions, so you're counting and squeezing to try to minimize every assembly command you send to it while drawing the screen.

Luckily it remembers the horizontal position of where you last said "DRAW IT NOW" so on other scanlines you can focus on doing such trivial tasks as loading each scanline's sprite data into the right register, hoping that you can load it into the register before the scanline passes the sprite's X position, because if you take too long, it will have drawn the sprite before you managed to load the new data.

Oh, and you only get 2 sprites and 120 bytes of ram to work with.

It's horrible and wonderful all at the same time. For some crazy reason, I'm loving it.  Tonight, for example, I was trying to figure out how to prevent the black bars from showing up on the left when you move a sprite mid-frame. Take a look at missile command and frogger:


Those are classic examples of games with positioning lines on the left -- the Atari hardware had a weird quirk where if you moved a sprite's horizontal position partway through the frame, it would draw a black line at the left. There didn't seem to much you could do about it. Quite a few games just gave up and had them. A lot of others (particularly Activision games, or so I've read), made the whole left bar of the screen be black, just to hide them.

But somewhere along the line, some smart person realized you could trick the Atari hardware into not showing them, if you wrote to the move register at EXACTLY the 74th clock cycle, at the end of the scanline. So I spent part of my evening counting clock cycles to try to write to that register at exactly the right time.

I ended up going with an easier but less elegant solution, which was to basically not put any enemies or background changes on that scanline, so I could spend an entire line just burning cycles to get to 74. It will work for what I'm going for, but prevents anything interesting from happening on that line.

Just for kicks, here's the code for managing that scanline:
      STA WSYNC   
        LDA #$80            ;2 prevent other things from moving on early hmove,
        STA HMP0     ;3  so clear out the movement registers 
        STA HMM0     ;3
        STA HMM1     ;3
        STA HMBL     ;3 
        LDY #7              ;2 (16 so far) ... 58 cycles left

BurnScanlineLoop
        NOP                  ;2  (7 cycles through each iteration of  
                             ;     the burn loop, 8 the last time through,
        DEY                  ;2    because the BNE only takes 2 cycles 
                             ;     if the branch isn't followed)

        BNE BurnScanlineLoop ;3 (2) (burns 48 during loop) ... 10 left


        LDA Temp             ;3  (basically a NOP, but needed to burn
                             ;3 cycles instead of 2)
        NOP                  ;2
        DEX                  ;2  Reduce the line counter since 
                             ;   skipping the regular WSYNC
        STA HMOVE            ;3  Do the MOVE!
        JMP ScanLoopSkipWsync ; Skip the Wsync since we used the whole scanline

And there we have it, folks. Clearly I've descended into unbridled insanity.


Wednesday, August 13, 2014

2600 and the teleporter

The thing that most causes me to give up and stop working on a hobby project is my tendency to decide on a new "ooh, shiny" programming project. I can't tell you how many times I've started something, but gotten distracted by something else along the way.

As I was working on Anguna, there were numerous times where I had to promise myself that I'd work on that "new shiny" project just as soon as I finished Anguna -- that was the only way I could keep myself motivated to finish instead of just giving up and starting the next project. Once I finished, I forgot what all of those other distracting projects were, so it no longer really mattered.

Well, suddenly I've discovered a new shiny. It's not really that new -- ever since about 2005 or so, I've had it in the back of my brain that eventually I wanted to try making an atari 2600 homebrew game. But somehow recently I got interested enough to spend some time reading up on how it worked. AND NOW I REALLY WANT TO MAKE ONE.

Ok, calm down, Nathan. You have another project, Robo-Ninja.

So right now, that's my biggest motivation for working on Robo-Ninja. The fact that when I finish, I can work on making an Atari game. Nevermind the fact that I'll probably have moved on to a new shiny thing by the time I finish.

Until then, I gave myself permission to mess around with 2600 programming at lunch, during the last few minutes at the office before coming home, etc. (And really, so far, that's been enough to be satisfying. I can't get anything done very quickly, but it gives me a chance to figure out how it works. Expect another blog post soon talking about my thoughts comparing it to GBA and Android programming)


Anyway, that said, I've been quiet about Robo-Ninja.

I recently decided I needed a teleporter.  One of my testers (thanks, Elijah!) suggested that it was really frustrating having to backtrack through levels, but I somewhat blew him off, since that is one of the main aspects of a metroidvania-style adventure game. But then two things happened:

1.  In my own playtesting, I discovered he was right. It was hard to backtrack.
2.  In one of my levels, I needed a new cool thing to discover, but not one of the main powerups.

So I decided it would be a teleporter. There'd be a few of them scattered around the world, and you could teleport between them once you discovered them.

So this involved quite a bit of new code -- I had to create the in-game "character" for the teleporter, to define the sprite and what happens when you collide with it, and a cool animation for making you teleport away.

Then I needed to track which teleporters you discovered, and link them to points on the minimap.

Then I had to build the UI for selecting where you want to go once you go into a teleporter.

This is just after I got whisked away by the teleporter


So that's what I've been working on for the past month or so. (If I worked on the game for more than an hour or so per week, it would probably help matters!) I think the teleporter is finally finished (other than tweaking the graphics on the UI screen), so tonight it's back to level design. Which I'm sure will make me think of some new crazy thing that I want to add into the game.

I'm never going to get to that 2600 game, am I?

Sunday, August 3, 2014

Android keyboard for Civilization 1

So I've recently purchased DosBox Turbo, the best (as far as I can find) implementation of DosBox for Android, and have been playing through old DOS games on my phone. It's been pretty awesome -- I've been currently playing Civilization 1, which is one of the best games ever, in my opinion.

The only problem is that for Civ, you need a keyboard with arrows and diagonals, as well as a number of regular keyboard commands. I've used the awesome Hacker's Keyboard for other games, but for Civ, I end up having to toggle back and forth between the "normal" and "alternate characters" modes repeatedly. And I'm using PgUp, PgDn, Home, and End keys for the diagonals, which aren't arranged intuitively on that keyboard. So it's a bit of a hassle.

So the other day, I thought, "how hard can it be to write a new keyboard layout to make this game easier to play?" Turns out the answer is "not very hard."  The android sdk distribution contains sample code for a simple keyboard, and it didn't take much beyond changing an xml layout file, and removing a bunch of unneeded code, to make my Civ 1 keyboard.

It's still not quite perfect -- there's still a bunch of unneeded code (left over from the sample code) that I haven't pruned out, and a few tweaks I'd like to make. But it sure makes playing civ easier.  If I ever get around to cleaning it up, I'll post the source and possibly put it up on the Play Store. Until then, feel free to download the apk file from me and try it out. I won't make any promises about the quality or anything at this point. But let me know if you happen to try it.


(and yes, I'm still slogging away slowly at Robo-Ninja)

Thursday, June 26, 2014

Oops I forgot the double jump

So tonight I was happily finishing up a level, and getting ready to start on the next, and checking my paper map that I sketched out about a year ago, when I realized I made a mistake. The map is completely missing the Double-Jump item. Yes, it's required, but no, there's nowhere to find it.

I need to now rethink a little bit of my map design to figure out where that's going to fit.

On a completely unrelated note, today I added flame shooters. What's a 2d side-scrolling game without flame shooters? (And as my office-mate Tim said "clearly it wasn't hard enough already, you needed to add something else to kill you")

Robo-Ninja -- now with MORE ways to die!

Monday, June 23, 2014

Tweaking consumable items

The work for the past couple nights has been redoing how consumable items work. Like I mentioned before, the problem was that players would likely just stockpile their slow-mo and checkpoint items, saving them for the "who-knows-what" later in the game. I needed a way to encourage players to use them, but not overuse them.

The solution I decided on: every time you pick up a consumable powerup, it adds 1 to your max that you can carry of that item. Whenever you use one, a progress bar VERY SLOWLY starts filling, and when it finishes, you gain back 1 of that item. I can easily tweak the amount of time it takes to regenerate your items, to play with making the items more or less precious. Currently, it's set at 5 minutes of real game time, which feels about right to me as a first pass, but we'll see.

Here I just used my only slow-mo item that I've pick up so far.
The progress bar below the item (in the upper-right) shows how long I have to wait before I get it back.

This was one of those changes that was surprisingly easy. I had to track a few more pieces of overall game state (max # of an item, and how far along the regeneration counter is), and then slap a new UI on top of it, but it all fit together nicely into the current codebase.  It's always nice when things work.

Saturday, June 21, 2014

Ugh

So I spent about an hour tonight trying to get everything working for my factory/industrial zone. But the ramp tiles just wouldn't work properly.

Until an hour later, when I figured out that the new method I was using to identify and mark my ramp tiles was 1-indexed instead of 0-indexed, so I was off by 1 tile.

Ugh.

Thursday, June 19, 2014

iOS & RoboVM

Well, thanks to my office-mate Tim, I have an old nearly-useless iphone 3g that I decided to see if I could get Robo-Ninja running on. LibGDX can build to iOS using RoboVM, so as much as I doubted it would work, it sounded fun to try. (RoboVM is a tool for compiling java code down to iOS native code, the similarity in naming is purely coincidental)

Step 1, since I'm not interested in paying Apple a $100 yearly subscription to run my code, was to jailbreak the phone. That was painful enough, searching for information and jailbreak files for a phone that old. Piles of broken links and outdated information.

Then I had to borrow a Mac laptop, since it will only build on a Mac. I installed RoboVM and all the necessary tools, and relatively quickly got Robo-Ninja running in the iOS simulator. It was a little slow, but it was Robo-Ninja!

The next hurdle was figuring out to build the ipa file (the iOS app package file, equivalent to the apk files in Android) without actually signing it with a developer certificate. At first, it kept breaking because I didn't have an apple  developer account. It took about an hour of googling, but there's a newly-added flag in RoboVM that lets you skip signing. So I finally got the ipa built.

Then a good 30 more minutes futzing with the ancient jailbroken phone to figure out how to manually install an unsigned ipa file, only to find out what I suspected: I needed at least iOS 5, and this thing is stuck at 4.

Ah well, it was worth a try.  Supposedly there's a few hacks that can allow an iPhone 3g to upgrade to iOS 5, so I may try one of those for fun. Until then, if anyone has a jailbroken iphone on iOS 5 or greater, and is interested in helping me see if Robo-Ninja will run on there, let me know.

Until then, I'll keep chugging away at the game. I'm working on the factory/industry area now, trying to get the tilesets and background put together. I realized today, looking at my rough pencil sketch of the world map, that I'm about 1/3 done with the level design. And probably at least 75% done with the codebase. So I'm getting there!

Wednesday, June 11, 2014

Oops I did it again

Just I did with ramps, I suddenly decided I needed a new gameplay element that throws off my previous design. This, kids, is why you actually plan things out.

This time it was moving platforms. You know, like many games have, a platform that moves up and down or side to side. Nothing revolutionary here. Although my design, for convenience, originally assumed that everything was on a strict grid. So I took some shortcuts by, for example, snapping your character to the grid when he was standing on a platform. And I also got to assume that the gridded static map tiles were the only things that the main character could collide with for "wall" collisions.
You can't tell from the static image, but these platforms are moving!


Suddenly these moving platforms could cause collisions at any point, not just on the exact grid lines. And the platforms aren't part of my tile map -- they're actually set up as "enemies".  So I had to go back and update my collision code to allow it to both function off the strict grid, as well as to provide a mechanism for enemy collisions to function as a "wall" collision.

That part was relatively easy. Then I ran into an issue where, when the platform was moving downward, you'd do a funny "bounce" thing, where the platform would move out from under you, then gravity would catch up and you'd drop to the platform, and immediately the platform would move out from under you again. It just looked dumb. So I had to rig up some code to "glue" you to the platform if you were standing on it (or clinging to the side of it, which I'll get to in a minute)

Really, it wasn't nearly as painful as the ramps, but it did require some changes to how things worked.

A few other things from the past week or two:

  • I added a "cling" ability that lets you hold onto a wall if you jump onto it. (I tried to get a screenshot of it, but on my laptop it requires simultaneously holding space (to cling), and Fn + alt + insert/PrtScrn, which my computer refused to do)
  • I've had a suggestion from a friend to rework how my limited-use items (slow-mo and portable respawn) work. He mentioned (quite accurately) that nobody will ever use the items, instead they'll save them the whole game, not knowing when they'll need them (he's right). So I'm considering new designs for how that works. I'm currently leaning toward a system where each time you pick one up, it increases your max number you can hold. And every few minutes (5? 10?) you'l regenerate one of the items that you used. So the only penalty for using them is that you'll have to wait to use them again.
  • At the suggestion from pretty much everyone, I've removed my countdown that occurs at the beginning of each level or respawn. I guess it was too much waiting. (Did any of you ever actually play through Ghosts n Goblins? I think I spent at least 12 years of my life watching that level intro each of the 8 thousand times that I died. My game is supposed to be painful, but not THAT kind of painful!)
  • Next up is the "slam" ability, which lets you slam straight downward from a jump instead of continuing forward. (I'm thinking it may also kill enemies, but I'm not sure about that yet)

Thursday, May 29, 2014

Level Design

About half the time when I design a level on Robo-Ninja, I'm moderately dissatisfied with it when I'm finished. It's either too hard, too easy, not interesting enough, or too dependent on getting lucky on your timing instead of actually figuring out how to do it properly.

Tonight, I finally built (most of) a level that I'm quite happy with. It's not hard to get through once you figure out the timings and what to do. But it will probably take a few tries to figure out those timings. And the arrangement of elements on the screen isn't as boring as some of the other maps I've done recently.

I've got quite a few levels to go...hopefully I can keep this up.

Just so you know...on my laptop, I have to hold alt + fn + prscr t take a screenshot.
It took a few tries to get this shot without dying.

Tuesday, May 20, 2014

Progress progress progress

So I guess I haven't posted in almost a month. Mainly due to a combination of:

  • Only having about 30 minutes to an hour at any given time to work on RoboNinja, so by the time I get some work done on it, I don't have as much time to talk about it.
  • The kids had "no screen week"in the middle of May, which meant I decided to take a week off from playing on my computer at home. ("playing" including my hobby programming!)
  • I've had more home repairs than usual, so I've been busier in the evenings than I'd like
Anyway, despite all that, I've been still gradually making progress. First, I managed to get the minimap sorted out -- my build script goes through each map file and builds a minimap image once at build time. Then as you go through the world, it copies little sections from that image to a blank image that is gradually built up to be the minimap that the player can see. When the player saves his progress, I just save that image, and keep gradually copying to it. It's a little bit wasteful (copying the image every frame, and saving the whole image with the player's progress), but hey, that's what modern fast processors and nearly-unlimited storage are for, right? (This NEVER would have worked on the puny little Gameboy Advance!)

Then I had to work through some issues where things wouldn't work correctly after toggling out of the game, then restarting it. I'd get a black screen and crashes.  Which turned out to be fairly obvious once I re-read the GDX documentation. All sorts of assets (textures, in particular) require you to pay attention to resource management, instead of just letting java take care of it. You need to manually release textures, and manually recreate them. In particular, toggling out of the game will destroy any textures you've loaded -- but the java object that tracks it remains.  So I had to reload my textures when reloading the game. 

Then I ended up having it mostly working, other than the slide powerup wouldn't work after resuming the game. You'd tap the screen to slide, and RoboNinja would just moonwalk to the right of the screen. It was weird.  This took some debugging, but finally I realized I was creating a 2nd instance of my "powerup" object -- one connected to the UI, and the other connected to the actual in-game character -- so the UI ended up being disconnected from the actual ability.  I had a factory class to instantiate my ability objects from their string ids, and it was happily returning a new instance to the UI when I recreated things. So I just needed to rework the plumbing to make sure that both the UI and the internal game state were using the same object instance.

Once that was done, all the bugs with pausing and relaunching the game seemed to be worked out.

Now I've started working on the "City" themed levels, which include an enemy robot that shoots lasers at you. I'm trying to set it up so that you can get through it if you haven't found some of the powerups in neighboring levels, but that it will be significantly easier if you do. It's taking some tweaking to get that difficultly level set. 

Here I go dying again. I do that a lot.

Wednesday, April 30, 2014

GDX 1.0

Well, after I said that I wasn't going to bother getting the gradle build working, it's time to eat my words.

About a week or so ago, Mario (the man behind libGdx) announced that they finally were officially releasing version 1.0 of libGdx. I've been dragging my feet about trying to keep up with changes to the library, as it's not completely backwards-compatible, and I didn't want to get on the treadmill of trying to keep changing my code to stay up-to-date. But after some consideration, I figured a 1.0 release was worth migrating to.

The biggest change between my old version (from about a year ago) and 1.0 was the directory structure and build scripts for your game. Like I mentioned before, they switched to a gradle-based build system (which is quite nice), and with that came some rearranging of the project directories.
libGDX has this cute little project creation UI that you can use to get everything set up correctly.

I figured the easiest route would be to create a new blank project using their nice project creation tool, then move all my code into the right places in it, and see if it would build. So I spent about 15 minutes copying source files all over the place until it was all in the right place, and tried building it. That's when the myriads of errors showed up (which I was expecting, with all the library changes over the past year).

Most of the compile errors were pretty simple to fix: they removed support for OpenGL ES1.x and now use 2.0, which just meant I needed to just change from using Gdx's GL10 class and instead use GL20 -- changing the name was enough, as the functionality I was using was the same across both of them.  There was also a change in the class hierarchy of one framework class I was using (SpriteBatch), so some of the methods I was overriding in a few places had to have their method signatures changed. Simple stuff.

When I got to actually running the game, it got a little more complicated. For the UI/HUD bits, I use a set of classes called Scene2d, which act somewhat like a traditional ui toolkit, letting you add groups/images/widgets/etc in a treelike graph to display on the screen and respond to input events.  Unfortunately (for me) they changed how the scene was mapped to the current GL viewport, in a way that caused all of my UI to be messed up -- they changed from 0,0 being the corner of the screen, to 0,0 being the center.  Ugh.  Because I had coordinates for my UI bits scattered throughout my UI classes, I really didn't want to have to figure out how to translate all of them.  So I eventually I gave up on doing it how they wanted, and just extended their Stage class (the base group that all scene elements get added to) to translate everything back to how it was originally.

So now everything was building. It was a relatively simple matter, then, to update my main build script that jenkins uses to just call the gradle build, and everything appears to be working so far.

So now I can get back to writing actual code.

Next post: squashing bugs related to leaving/resuming the app.  Oh, and I just realized that I never did post again about what I ended up doing with the minimap. I guess I need to do that as well.

Wednesday, April 16, 2014

Minimap and Jenkins Build

Well, after finally get the exporter in Tiled to do what I wanted, (and as a side note: my changes got accepted into the project today. Tiled has one of those maintainers that's actually pleasant to work with!), it was time to make my build scripts to actually generate my minimap. Which made me realize it was time to actually have proper build scripts.

When I started with libGdx (almost a year ago?), it didn't have a good build system prepared with it. You pretty much rolled your own build scripts, or just used the "build" button in your IDE (which embarrassingly, is what I've been doing).  The author has recently come out with a gradle build script, but that would require me going back and updating all of my libGdx stuff to use the newest version. Which I'm not ready to do at the moment.

Well, I found someone else's ant script (yuck!) for how my project is set up, so I figured I could start with that, to at least get a scriptable build started. I'd rather do it all in gradle, but I really don't know enough gradle yet to do it without investing a good bit of time, which is not what I want to focus on now.

Anyway, so today I got the build scripts working, and running on my Jenkins server, so whenever I push my commits to my Bitbucket repository, Jenkins will build the phone version of Robo-Ninja. So I finally don't feel quite as dirty. And when Aaron pesters me to get Robo-Ninja installed on one of our Android devices, I've got a build already put together, accessible via the web browser. (If anyone wants the link to the daily build version to play with, just send me a message.)

Now that I've been fully sidetracked just to make the minimap, it's now time to figure out how to actually display this thing in the game, and for the harder part, figure out the best mechanism for revealing just the parts that the player has seen. This might get tricky.

Wow, when I look at this dinky map of my levels so far, it looks like I really haven't done ANYTHING yet.

Monday, April 14, 2014

More contributing to Tiled

Well, after submitting my changes to Tiled, and discussing it with the maintainer, we decided that instead of working around their goofy hard-coded ommision of the collision layer, it might be worthwhile to completely rework the command-line flags for including or omitting layers. So instead of working on Robo-Ninja directly, I spent the evening working on Tiled.

Specifically, adding command-line flags to their export utility that let you specify layers by name to omit, and let you also tell it to just use the visibility settings of the map itself.

This code is all in C++. I haven't written anything in C++ in YEARS. 

Sunday, April 13, 2014

Hooray for Open Source

Today I started investigating how I want to handle the mini-map. I still haven't completely settled on a design that I like. Some of the questions or factors that I need to think about are:

  1. The minimap needs to be smart enough to (at least mostly) build itself from my level data, without me having to go back and build a big minimap by hand.
  2. I want to minimize the effort involved -- I neither want to have to add a bunch of meta-data to my maps to give them hints about displaying themselves on the minimap, neither do I want to have to write a ton of code for the build process to make it build the minimap.
  3. How much detail do I want to show on the minimap? In Anguna, the dungeons were just wireframes of the rooms (which is closer to a Super Metroid-style map), but the overworld was actually just the image of the overworld map scaled down to any extremely tiny size.
Super Metroid's wireframe map. Robo-Ninja's world is about as big as the "Brinstar" section of Super Metroid.
(bonus points for those of you that can point to Brinstar on this map without looking it up)


I'm leaning toward doing scaled down images (in answer to #3), so I started looking into a simple scriptable way to dump an image file from my map, using the Tiled editor. Turns out, they have a command-line utility for dumping them. The only problem: it omits any map layer with the name "collision" (why they hardcoded that is beyond me), which is the name I use for the primary layer in my maps!

Luckily, it's open-source! It took about an hour to:
  • Find the place in their code where it omits "collision" (actually, I didn't realize that's why my collision layer wasn't getting exported until I searched through their code!)
  • Change the command-line utility to take an argument flag to tell it whether to omit that flag
  • Compile, test
  • Send a message and a pull request to the maintainer, in case they're interested in using the changes.
So now I can dump out my images of my maps in an easily scripted method. Hooray for open-source!

Now I just need to decide about #1 and #2 above. My map files theoretically can figure out how they're all connected to each other, based on the "exit" hotspots, that warp you from one map to another when you get to a certain edge. But the maps don't really know their absolute position in the overall world map (which was just poor design/planning on my part).  So I really need to decide between computing each map's position by tracing through all the connections between maps (from a known start point), vs going back and adding metadata to each map to tell it what its position is in the global map. I'll have to think on that some more, I guess.

Wednesday, April 9, 2014

Back to the Ninja

Well, the Dart coding was fun. I ended up spending a few weeks-worth of coding-with-one-hand-while-holding-a-baby-in-another playing with it. My verdict: I'm not sure I was any more efficient working in it (particularly with the combined pain of learning a new language/framework, lack of documentation, and lack of 3rd party libraries), it was definitely less painful than javascript or other traditional ways of doing web development. I'll be interested to see if it goes anywhere. Being a Google technology, I don't have my hopes up.

So this week, I'm back at Robo-Ninja. I think the trick to getting me to finish a development project is to have a fan. Having Aaron pester me about it is a good motivation!

So during approximately 10 minutes last night, and 15 tonight, I managed to get the consumable slow-motion powerup working. It was one of those happy times where everything fits smoothly into your design without bumping into any nasty corners.

I also realized from testing that my icons for cycling through your abilities were too small. It was fine on the computer with the mouse, but once I had my hands on the screen, blocking my view, it was really hard to tap the right spot quickly between manically tapping the screen to time my jumps and slides. So I've increased the size. Hopefully that will help, but I haven't had a chance to test on my actual phone again yet.
The icon on the left is after the size increase. The consumable items on the right are how big they were originally. 

Next steps: the wall cling ability, and the minimap.

Monday, March 17, 2014

Lack of UI libraries in Angular Dart

So I'm still slowly chugging along playing with Angular Dart.

The thing that's bothering me now is, because the it's such a new language/framework, is the lack of decent UI stuff. I needed a pretty date picker for my test project. I could either use the HTML5 date picker which isn't supported in half the browsers out there, or write my own.  I guess I could alternatively import all of jQuery and figure out how to get Angular Dart to talk to a jQuery widget. Ugh.  I finally found someone that had written one using WebUI, a deprecated system for making widgets in Dart, and managed to port it over to Angular. (if you are reading this and need one, email me!)

Tonight it was an autocompleter that I needed. Again, I ended up spending awhile converting a WebUI widget. Which is great practice for learning a language and framework, so I'm not complaining too much. But it certainly cuts down on the productivity.

The way components in Angular Dart are written, I can envision a world with a huge library of simple-to-use UI components. It's MUCH MUCH MUCH cleaner than trying to pull in javascript libraries for a widget. But I guess there's just not any real community or momentum behind the project yet.

NES Anguna

Well, I had a little bit of time still, while Frankengraphics is finishing up her game Project Blue, to have a little downtime on Halcyon, s...